.png)
What To Do With Old Family Letters to Preserve Family History?
- Devon Noel Lee

- Feb 16, 2023
- 5 min read
Updated: Nov 11, 2024

Do you have family letters in your family archive? Are they love letters, letters home from the war front, letters from traveling, or letters from serving missions? Correspondence is often full of genealogy gold and gives us fantastic insights into the minds and emotions of our ancestors.
But what can you do with these old letters to help our family appreciate them more?
In the post "What To Do With Family Journals or Diaries?" I shared many steps for preserving family journals and diaries. I recommend you watch that video to learn how to project the physical artifacts you have and how to digitize the pages.
After digitizing your family letters, consider creating an easy or enhanced letter project.
The Easy Old Family Letter Project
The easiest preservation project publishes a series of letters in a bound book. You can include only digital copies of the letters or insert pictures of the letters with a transcription following each image.
Arrange the letters chronologically by the date the author wrote them.
While this project is easy, remember to add a few enhancements to make them enjoyable.
At the front of the book, introduce who the letter writer(s) is. Then, provide context for the time the letters were written and why.
For instance, a series of letters written to Charles Thomas’ parents while he served during the Civil War between 1862 and 1864.
Or letters written between spouses Jeremiah and Katherine Hendrick while he traveled to California during the Gold Rush. She cared for their young daughter in Rehoboth, Delaware.
If you have maps, photos of the letter writers, or pictures of the places mentioned in the letters, sprinkle them between them to add more visual interest.
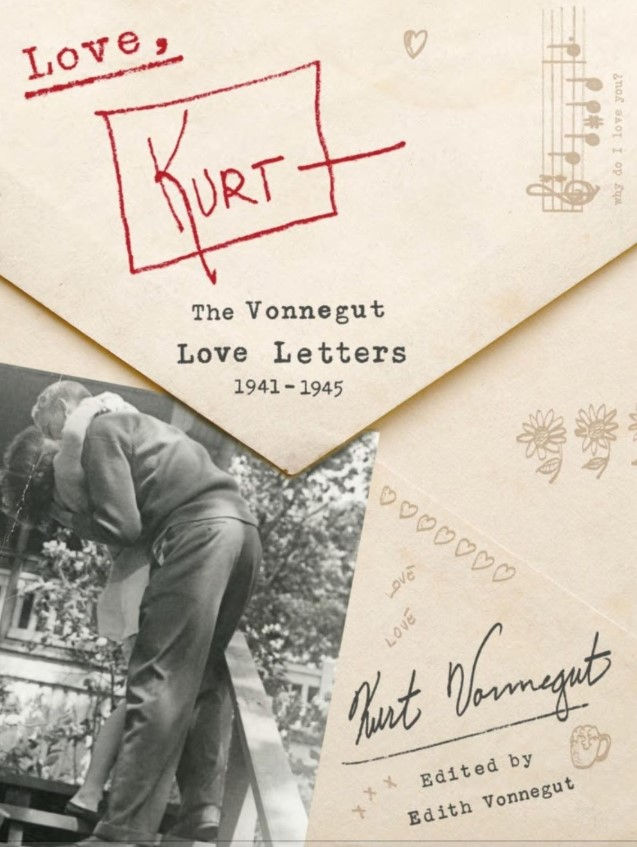
A good example of scanned letters interspersed with photos is the book Love, Kurt by Edith Vonnegut.
Once you have all those items prepared, create a PDF file of the content and send it to Lulu.com for publishing. They do an excellent and affordable job.
While this easy project makes letters shareable with family members, the following suggestion will make them far more enjoyable. The work is challenging.
Can you handle it?
Listen to this discussion about preserving old family letters.
The Enhanced Letter Project
The Enhanced Letter Project begins in the draft phase, similar to the Easy Project.
Include digital copies of the letters and a transcription of each note.
Arrange the letters chronologically by the date written.
Explain the letters
Now, you’re going to read each letter critically.
For instance, if the letter said, “The captain gave us double rations for successfully completing our AIT today.”
Who is the captain?
What is their name?
What is their age?
What other details can you find out about them?
What are double rations?
How rare or frequent are they?
Would someone consider this a reward, or is it a punishment?
What is AIT?
Define the acronym.
Then, explain what this might involve.
How easy or difficult is AIT?
In short, digitally mark up the transcription of the letter. Think like a reader unfamiliar with the letter writers. What is happening that a reader wouldn't understand, but the writer would.
Repeat this process from letter to letter.
Adjust The Chronology
Whether your project includes letters written by one person or exchanging a series of letters, insert a communications timeline.
Often, letters will overlap between correspondence. Or, writers will tell stories out of order based on when they happened. For instance, a writer could say, "I forgot to tell you about…"
This revision aims to make the final project flow better from a reader's standpoint.
Now, this might mean that you take portions of a letter from when it was written and move it earlier in the letter order. At this stage, consider that your final project will likely not contain every digitized letter within your book. Perhaps you’ll include clippings from the letters to add visual interest to the writers.
While making that decision, move the transcribed and marked-up sections to the proper arrangement chronologically. Then, create a reference (not a full citation yet) to the letter from which that section originated.
↪️ Do you want to write a family history book?
Grab your copy of this FREE Writing Guide:

Add Historical Context
With the content of the letter arranged chronologically, add historical context. For example, you may have letters between two lovers attending different colleges. Incorporate details about:
the universities they attended,
the culture of the schools,
what each person studied,
what each field of study requires to earn degrees,
who finished their education first and
how far apart the lovers lived.
Next, local and world events, technologies and entertainment of the day and social customs are layered into the story.
Anchoring your correspondence in a time and place makes this series of letters more engaging for your readers.
Final Arrangement Decisions
Finally, there are better ways to tell a story than chronological arrangements of letters.
Consider rearranging the correspondence one more time into thematic categories.
Many writers discuss multiple topics in their notes. For example, they could discuss education, work, service, faith, politics, trials, etc.
Even with the discussion in chronological order, your final project can still be difficult to follow unless you group correspondence by these topics. Then, each topic can become its own chapter.
One chapter may discuss veterinary medicine training experiences.
You can begin with a memory the vet student shared.
Then, follow up with the non-vet student’s reaction and follow-up questions.
Then, move on to the next vet-related memory.
The next chapter may discuss the football season and the associated activities the sorority members participated in. Even though the sorority/football season experience might overlap the vet medicine stories, you should collect the related messages in separate chapters.
Thus, your reader will know each chapter has different timelines, but the conversation flow is smoother.
Finalize Graphic Choices
Similar to the easy project, you will want to add visual elements that enhance the story of the letters. These elements may include maps, artifacts, newspaper clippings, and more.
However, the advanced letter project will need to finalize your decision on how many digitized entire letters to include.
You could publish a book that contains all of the letters at the end of the book. Give each letter a reference number, then craft citations to refer to the document. Thus, the vet stories could appear in letters 4, 8, 12, and 15. The sorority girl’s topics appear in 3, 8, 13, 14, and 15. Anyone wanting to see the entire letter can then know where to look.
Then, you can include clippings of the letters within the body of the rearranged text.
A writer may have had a funny way of writing something.
Perhaps they used hearts on the letter ‘i’ or excessive exclamation points or capital letters.
Perhaps the author doodled a lot.
Choose highlights of the handwritten letters to include in the body of the text to make the pages visually appealing and remind your readers that all your content comes from a series of letters.
Why Project Will You Choose?
I hope you now have many ideas for using the letters in your family archive.
For family history writers, this can be a fun and challenging experience. However, for those who are more focused on preservation than writing, you can publish the letters so that someone else can enjoy what you make. Perhaps they’ll tackle the advanced project in the future.


Comments