.png)
How to Arrange Photos in Family History Books
- Devon Noel Lee

- Jan 11, 2020
- 4 min read
Updated: Apr 14, 2025

Reader Question: Where should I put the photos in my writing? Should I put the images next to the paragraph I wrote? Should I put them at the end of a chapter? Or should I put all the photos in a photo section? ~ Robert Murphy, PA
Thanks, Robert. Great question.
Having written over 120 drafts of my ancestor’s life histories and publishing numerous scrapbooks and family journals, I suggest the following keep photos close to the action in your self-published family history book.
Arrange Photos Close to “The Action” in the Book
Avoid creating a ‘photo section’ at the end of a chapter or an entire book.
Picture a history textbook or any non-fiction book written for children. Where are the pictures of the airplanes, political leaders, or animals?
They are placed next to the subjects of the paragraphs. Children would rarely turn to the back of a book to find a photo section. They want a picture of George Washington right next to the text about the first United States President.
If you want your descendants to appreciate the photos and the text you’ve compiled, place the picture, document, map, or other images as close to the sentences or paragraphs to which these graphics refer.
The placement of your images is a matter of art rather than science. You may have to add the photo, map, or document before you introduce the subject or slightly after. (Don’t have photos, watch this video to learn where else you can look.)
Options For Arranging Photos in a Family History Book
There are several methods I use to arrange photos in my family histories. I typically publish 6-inch x 9-inch vertical books as they are easiest to hold and very portable. If you publish a larger book, you can use the same strategies:
Full Page Images
Half Page Images
Smaller Images with Text Wrap
Check out these examples of photo arrangements.
↪️ Do you want to write a family history book?
Grab your copy of this FREE Writing Guide:

Full Page Images
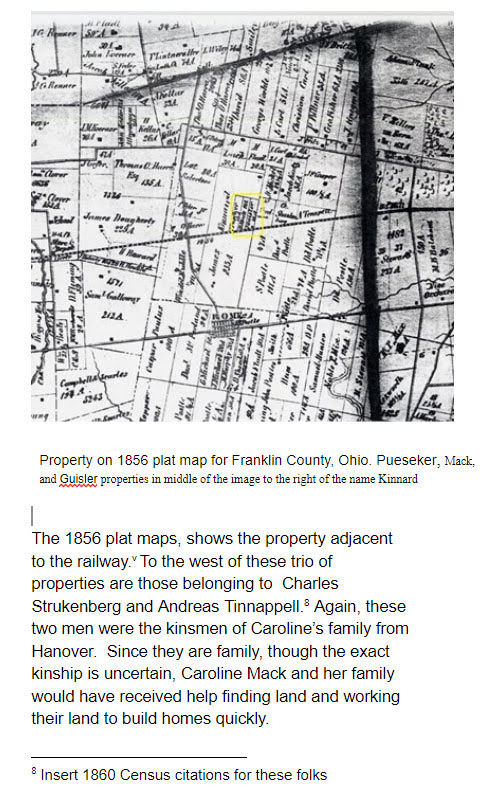
If you have a picture with a high-quality, vertically-orientated photo, the easiest way to insert the image is on its own page. A photo of people, places, and things, or documents can fill an entire page opposite a relevant section in your story.

Insert a caption below the photo to explain the relevant details. You could also cite your images in the caption section.

The other option involves writing a caption with a reference mark to the source citation at the end of a chapter (as shown in the example above).
The choice you use depends on who is your intended audience. Most general audience readers prefer citations at the end of the book.
If you prefer to create an enjoyable reading experience for the average reader, then use the caption with the chapter endnotes method. (Bet you can tell real quick which one I use more often than not.)
Half Page Images
The next arrangement using an image on half a page and the other half continues the story.
This arrangement works well if you have you have vertically or horizontally oriented images (portrait vs landscape).
Example with a graphic at the top of the page.
Sometimes your image will appear at the top of a page (as in the above example). You could also place the image at the bottom with the story above.

Example with a graphic in the middle of the page.
I have also placed an image with a short height in the middle of the page with text above and below the picture. (See above)
Smaller Images with Text Wrap
The final format involves inserting an image onto the image and having the text wrap text around it.
Although this format seems simple, there are several things to consider:
Keep the captions no longer than half the visual height of the image.
Use superscript marks and reference citations at the end of the chapter to keep the text near an image brief.
The caption font should be at least 2 points smaller with a different font family than the boy of the text.

If you have a body font in Times New Roman, then the caption font should be something similar to Arial.
Additionally, some images do not require citations if you cite them within the story near the image.
Programs That Help You Arrange Photos
You can format your family history with any text editing program.
You can use Microsoft Word, OpenOffice Writer, or Apple Pages to format your book. Or you can splurge and use publishing software.
Avoid using Google Docs. It is not meant to be a self-publishing platform. I have not found arranging photos in Google Docs to be effortless or successful.


Comments